Your website is built on HubSpot and while you've found tons of content on how to add a social media feed to a WordPress website and even a plugin, but you just can't find something specific on embedding your social media posts in your HubSpot site.
No worries! In this tutorial, that's exactly what we're going to show you.
We'll be detailing why you should considering adding your feed to your website, how to curate and design a beautiful social media feed, and exactly where to add the HTML code in your HubSpot website.
Why add your social media feed to your HubSpot website?
Embedding a social media feed in your website is fast and easy, so you don't need reason to make the effort worth it (trust us, it takes about 5 minutes).
However, your website is important. Regardless of how easy it is to embed a feed, you shouldn't do it for no reason. There should be a purpose for every single element on your website.
Here are some reasons why you might add your feed to your HubSpot site:
- Add personality - Jazz up your website by showing off pictures of your team, your customers, or anything else.
- Add visual content - It's simple. Adding great visual content to your site makes it more interesting and engaging.
- Promote a campaign - Are you creating a branded hashtag, a giveaway, a podcast, or something else? Maybe you simply want to aggregate social media posts related to a specific campaign and only add these ones to your site.
- Encourage more UGC - User generated content is images captured and uploaded by your customers and fans. By embedding UGC on your website, you can spread awareness that your brand loves receiving these kinds of images encourage more people to share them on social media with a specific hashtag.
- Contextualize your product - Images of your product being used (not just sitting pretty) can greatly impact sales.
- Promote an event - Do you hold an annual event? Pictures from the event can help generate excitement for next year.
- Share portfolio samples - Maybe you offer an artistic or expert service? Showcase your work on your website.
Of course, the above list isn't exhaustive. There are plenty of other strategic motivations too.
Examples of an embedded social media feed
Want to see some examples of what an embedded social media feed actually looks like?
Here are three examples to inspire you.
A travel site for Fairbanks, Alaska embeds its Instagram posts in its website to show prospective tourists what sights they might see if they come and visit.

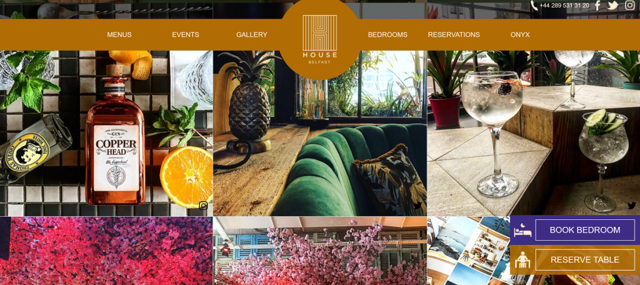
In another example, House Belfast showcases its beautiful Instagram feed as a way of enticing website visitors to book a room or reserve a table in the restaurant.
Here's another example from the US Track and Field team. In this example, they separate their social media feeds in different tabs by platform (Instagram, Twitter, and Facebook) so that website visitors can navigate easily to the different content formats.

All of the above examples were created using Curator.io.
How to add social media posts to your HubSpot website
Now it's time to go into detail how to actually add your social media feed to your HubSpot website.
As previously mentioned, this should only take you about 5 minutes. No really! If you're being really selective, deleting or approving posts might take you a bit longer, but the base steps can absolutely be achieved during that short span of time.
Step 1. Choose where to pull the social media from
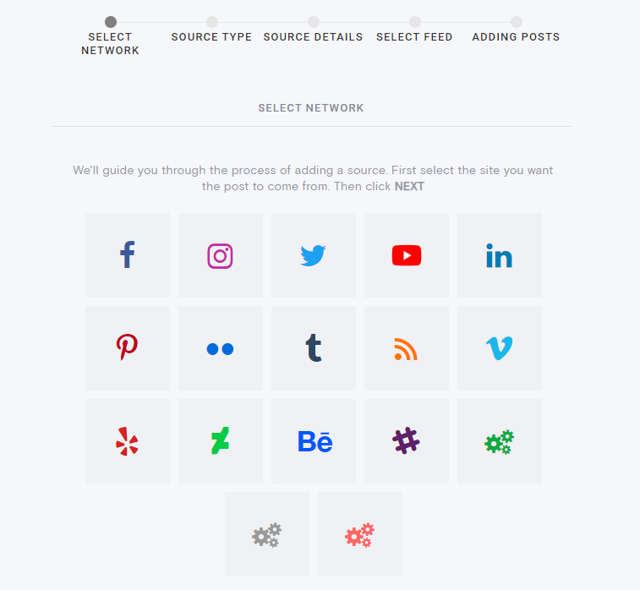
The first step is to choose which social media platform you want to pull content from. This is called a source. You can mix multiple sources in one feed, or if you prefer, you can make a different feed for each source if you want.
As you can see, there are over a dozen sources to choose from, not only the top social media platforms but also Slack channels, RSS feeds, Behance, and more.
Step 2. Add the source details
For this tutorial, we'll go ahead and use Instagram, since that seems to be a very popular platform for aggregating social media content.
After you choose the network or platform, you'll need to select the source type and add the source details.
Let's go ahead and use an Instagram hashtag that will let us pull in all the posts using that hashtag. You can pick any hashtag you want, but you will have to have an Instagram Business account for this to work.
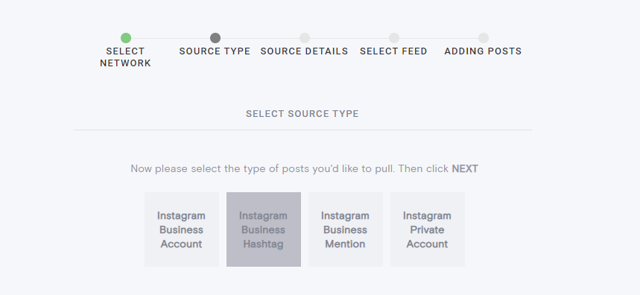
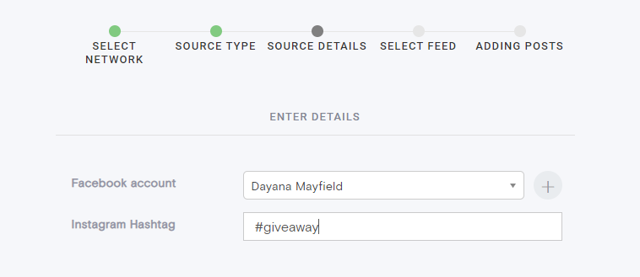
Next, you need to choose the name of your Instagram Business account and pick the hashtag you want to aggregate content from.
The hashtag can be a branded hashtag that's unique to your company or something more generic. Whatever suits your purposes.
Step 3. Curate your feed and delete any posts you don't want
After you've set the source details, you can add that source to a feed, and then it's time to curate the posts.
You can set your feed to automatically approve posts so you don't need to worry about them, or you can set it to require approval.
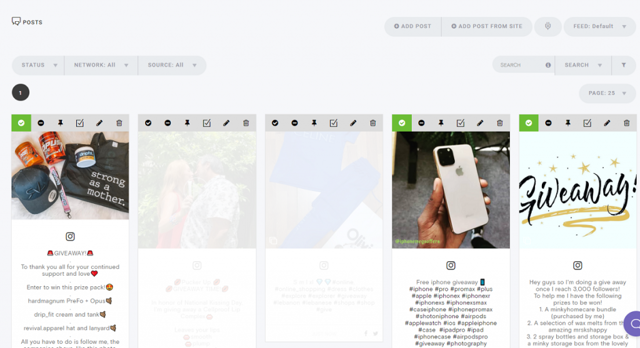
The default setting is to allow posts to get published unless you delete them. Let's go ahead and delete the images that we don't want to show up in our feed.
Step 4. Design the style of your feed
Once you've deleted the social media posts that you don't want to include in your embedded feed, you can go ahead and customize the style of the feed.
The default setting is Waterfall, which includes post captions below the images.
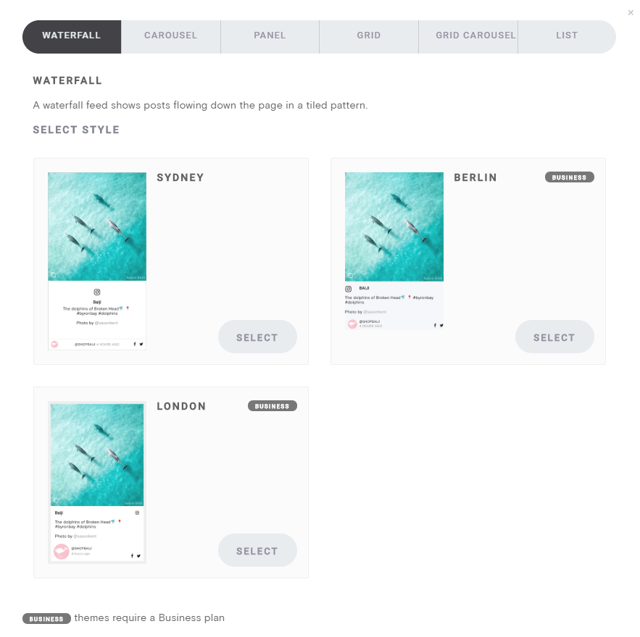
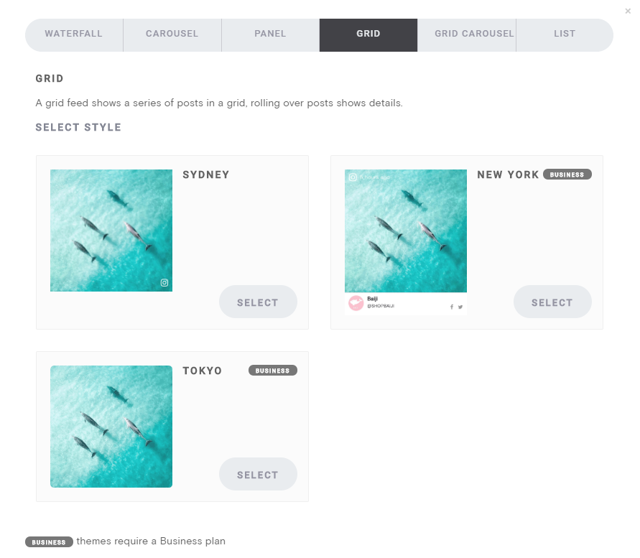
There are other templates as well. Let's select a Grid style, which conceals the post captions unless the website visitor hovers over them. This provides a cleaner look.
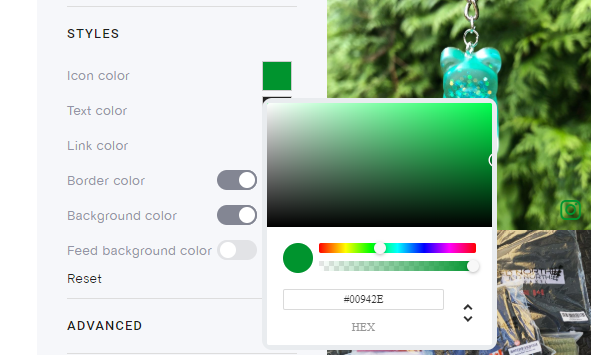
You can also change other aspects of the style of your feed, such as the social media icon color, the text color, link color, background color, and more.
Step 5. Copy the HTML code and paste it in your website
The next step is simple. Don't let the code scare you.
All you have to do is hit "Get Code" and you will generate HTML code that you can copy and paste inside of your website.
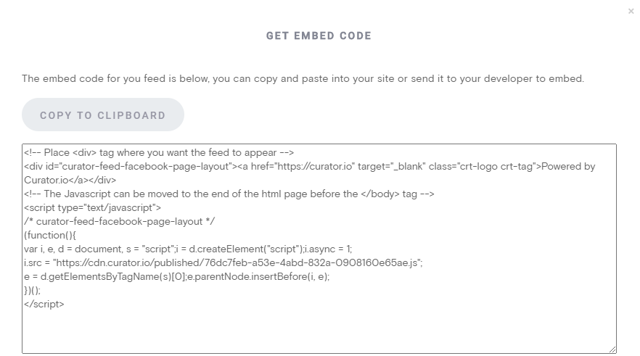
When designing a website on HubSpot, it's really easy to add custom HTML code just about anywhere you need it.
One common option is adding your social media posts to the footer of your website so that they show up on every page.
To add the HTML code to the footer of your website, check out this simple HubSpot tutorial with steps. You'll login to your HubSpot account, then navigate to Website > Pages, and then select the domain you want to edit.
From there, you can directly edit the HTML for your website's header and footer.
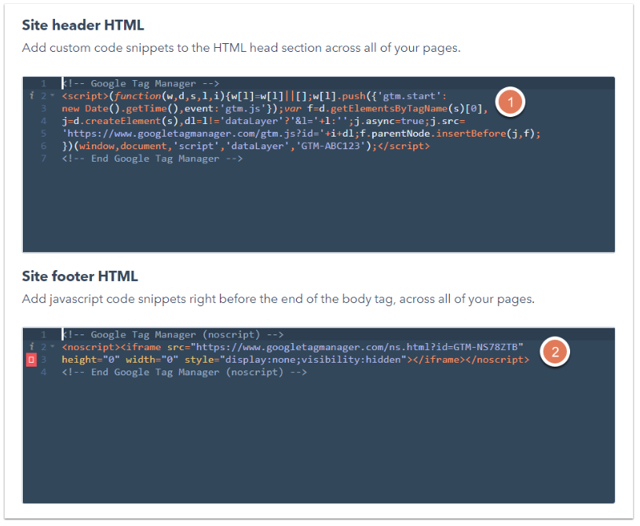
All in all, the popular places to embed a social media feed in a HubSpot website include:
- Dedicated section on home page
- Footer of all pages
- Footer of certain core pages
- Blog side bar
- Dedicated page for a certain purpose (campaign, portfolio, etc.)
Essentially, you can embed the code anywhere that you want! Just remember that when you have a purpose for your social media feed (whether that's something simple like adding personality to your site or more involved like sharing user-generated content), it becomes a lot easier to decide where to paste the code.
Here's what the completed feed looks like:

As you can see, embedding your social media feed into your HubSpot website is a simple task that can have a big impact on your marketing and your brand.